Wednesday, May 22, 2013

Work in progress (VF 25f tornado messiah Pt3)


I think this will be the one of the last updates on my VF-25f tornado messiah, all the main units are assembled, and panel lined the only thing left is aplying the w2aterslide decals, the clear coa and maybe some weathering and paint chiping, but first things first.
I finaly finished the "main" unit, clear coated the wings to prevent the waterlide decals to be damaged by the friction.
on my last post I gave an example of one of the few changes on the construction, I didn´t knew how it will work and how this changes will look, well it works great, way better than the old fragile pieces, but it doesn´t look as great, I dont know why bandai didnt molded the pieces in white thoug.


the gunpod: 


After the gunpod the only thing left to do was to paint some pieces for the tornado pack, I decided to pain them all in one go.


then the assembly of the tornado pack and the panel lines. 

some detail on the turbines for the wings 

Outtake tornado pack 

Ive had problems with almost all the pieces of this build, but the tornado pack is very simple and well made, everithing fits great! 

Im very pleased how the missile pods/corncubs turned out.

Finaly al the "units" jsut waiting for the waterslides and the clear coat 


I think you wont see an update for this build in a while, first I have to decide if I´ll do a clear flat or semi gloss coat, and some weathering.


Wednesday, May 15, 2013

VF-25 & Tornado Pack


I found this cool picture of the diferences on the wings, as you can see the Normal vf-25 has a more delicate and very fragile pieces on the wings,the tiniest is the one that suports all the weight, armoured versions also come with this fragile system, that is one of the main reasons I've nbever transformed my Armoured VF, I'm afraid that with so much weight making preasure on that little and fragile piece it will break, and once that part is broken, the game is over for transformations.
One thing that Bandai did well on the Tornado Pack is changing this, before, there were 4 pieces involved on this mechanism, now there's only 3, making all the small pieces into one, I haven´t asseble them together because the decals have to be aplied first, so I dont know if they look as good, or if they work as well as the old ones, but so far this is a welcome change.

Tuesday, May 14, 2013

Work in progress (VF 25f tornado messiah Pt2)

Ok, time for a new update on the VF-25f tornado, so far this has been an interesting kit to build, almost every single part you build will require some extra time, far from perfect in so many ways.

I wasn't able to do alot this week, mainly because I had to paint most of the pieces, like the hole lower leg inner frame, I painted it while still on the runners, that was a waste of my time, you can only see one side of it, the other side will be covered by the armour, this was my mistake, I have done 2 macross frontier kits before this one, I knew that side of the frame will never be seen, why I painted it? I guess I'm stupid, there's no other reason, a waste of time and money, once I realized this, I felt even more stupid because  I could have painted parts that need to be painted, like the armour on the back of the leg, that part is actualy made from two separate parts, with a samller one with a hole on it, both pices come in a light gray, but when you see the manual and reference pics, a good part of this armour must be in a darker gray, so I painted ir along with some estra details, I also decided to experiment on this, I masked one part, the other one was still on the runner and I decided to do aply the paint whithout masking it.


As you can see on the pic below the diference is not noticeable, if anything I spended more time on the masked one, because in both I had to correct some minor details, but I spended extra time masking the one on your right. 

Some extra detail with the dark gray, the metallic red was painted with a gundam marker. 

Here are the "finished" legs, on theese you can see some of the paint job on the inner frame.

So, I started with the main body and the wings; I was gona paint the under side of the main body, but that would be alot of work that you'll arely see, so I decided to only do some panel lines on it. 

also painted the midle chest piece. 

Finally Im working on the wings,and the fins, I painted those because the red has a two part decal, that wraps around the small spikes on the back of the fins, I tried that decal on the VF-25s armored, with very ugly results, so this time I painted it, and it looks way better than the decals provided by bandai, I became aware that the red  I used is alot darker than the one on the water slides, I hope it doesnt look that much once it's clear coated. 

I wasn´t gona do anything on the wings, because I thought this kit was gonna be like the armored VF-25, with wings over wings, obviously you can't see any detail on the "main" wings on that one, but on the tornado kit the under wings do show a little, so I guess I'll have to aply some water decals and clear coat them ahead of the rest of the valk.
But that´s for the next post, I guess.

Wednesday, May 8, 2013

Work in progress (VF 25f tornado messiah Pt1)

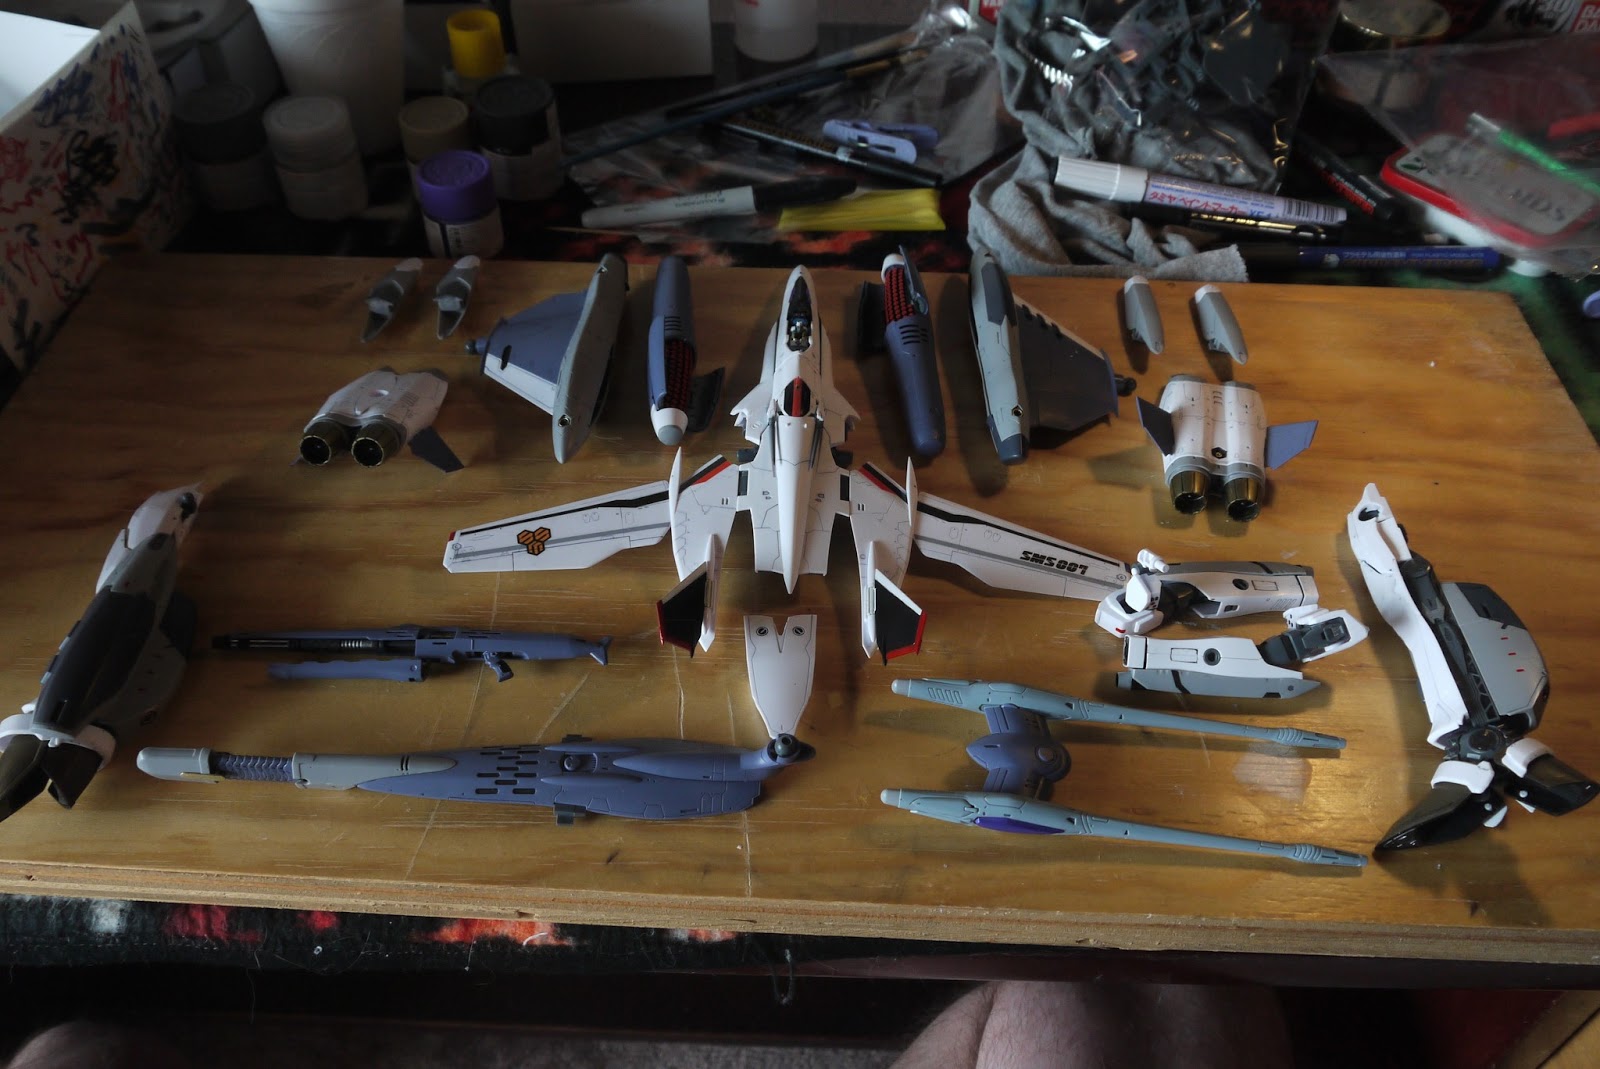
Time for my promised update, I have been working on this valkyre for more than a week, and I've been somewhat disapointed by it, It looks great so far, but the fit for some pieces is not what you should expect from bandai, so far, there's problems in every body part. I'll start with the very first piece you build, the nose cone, I´ve builded the VF-25s armored messiah, and the VF-27, both of them had perfect fits on the nose cones, so perfect that I didnt felt the need of gluing them together, but, with this one, the diferences between the two parts were tiny, but very noticible, wich is a big problem on the nose cone, I have learned (thanks to the YF-21 hasegawa kit) if you dont have this part near perfect the hole model will look unbalanced, especialy in jet mode, so I decided to aply some cement to fuse both parts and sand it to make it look even, it worked, not perfectly, but it worked, you can still see a very faded seamline and scratches from the sanding in there, but it´s barely visible, onces it´s clear coated the scratches wont be vissible.

 The white part in the crotch armor, is a sticker, wich by the way fits perfectly, I wish I could say the same for the rest of the stikers and waterslide decals.

This is the cockpit, my work it's not perfect but I'm very pleased with the results, I think I'm geting better at this! 

Rear view.

Cockpit with little Alto 

Here you can see the hole front of the Jet (almost) the clear purple part was a pain to paint, I tried to mix tamya clear red and clear blue to make a clear purple, but, for some reason that doesn't work, when you mix those, it creates a non clear brownish thing. I tried alot of thigs, but I ended up mixing some tamya puple with alot of clear, something like 10 to 1, and ended up with a clearish purple, not as bright or clear as I would like but I think it looks good.

Next, nother sensitive part of any transformable Valkyre build: The Head.
Started by painting all the parts that needed to be painted on the runners, for the antenas I cuted the frame of the runer so it didnt got in my way, I tried to mask this thing, but I coudn't do it, the masking tape didn't stayed on place, so I painted it withiout masking the pieces, and it turned out great.
The head, panel lined, only a few stickers missing 


Rear view 

The arms, where do I start? between my mistakes and the lack of a good fit on the forearms they have been a pain, As I said before, I've builded before the VF 25s armoured, wich uses the exact same arms, on that model the fit between parts is not perfect but it's acceptable, on this one, the white part that holds the extra armour is poorly made, it feels almost like it's part from another model, didn't bandai uses the same molds on all the VF25's? I thought so, but after this, I seriously doubt it, also you will have to rescribe  the rectangular lines on that one, they are poorly scribed and if you try to do the panel lines, the paint won't hold in there. so I just rescribed those and lived with the poor fit, I didn't glue them together because if I do that, the sanding will be so heavy that most of the panel lines on the forearm will disapear, and I didn't want that, I dont have the time, tools or the skills to do it.
If that wasn't enough, I decided to paint some detail on the extra armour pieces, and missed miserably. 

As you can see I masked where I was planing on paint some details, I thought it was ok, It looked ok, but everything that could go wrong, went wrong.

when I removed the masking tape the horror filled my eyes, some of the paint chipped when I removed the tape, 

Also the paint went under the tape because of my poor masking job, I had to remove the paint and do it all over again... 

After finishing the arms, the legs come next, I decided to try to do some new stuff, so I aded a few scratches on the feet, later (after the clear coat) I'll do some drybrushing to hopefully add some scratches on the foot 

the turbine intake have this gray piece, on it, the panel lines are very poorly scribed, so I had to re-do those with my knife, here you can see the diference, on your right the piece without the re-scribing, on your left the panel lines are redone.

This is all for now, Im somewhat disapointed with this kit, it looks great so far, but I never expected to have so many problems, and this is just the beginning